

Just when you thought it was safe to go to BBQ or oven and grill/cook another turkey breast in an unimaginable way along comes some new frightening method to fix a roasted turkey breast in a creative way.
Get over the mundane! A big part of the grilling and barbecuing scene is to have the stuff you fix taste good and not resemble Jane and John Doe's.
I started out with a seven pound, plus frozen turkey breast. Actually, it was so big it could pass as a full-size turkey. But, you can get away with a much smaller one. Let it unthaw and wash thoroughly, inside and out.
Rub the turkey breast with EVOO. Gently part the skin away from the body with a thin bladed knife and sprinkled on a generous portion of Ground Cinnamon in between the skin and the body. Sprinkle more Cinnamon into the cavity.
Place the turkey into either a large plastic marinating bag, or a large plastic container. Pour maple syrup over the bird and brush on evenly. Pour syrup into the cavity also. If you're rich use the real stuff�.otherwise imitation will do. The turkey will never know the difference. Marinate over night.
You say, "That's it?" No "Buzzard's Breath Big Bad Sauce"? "No Hotter Than Hell - You're Going Die Dude Rub"? "What's the barbecue and grilling world coming to"?
Sometimes simple is good! And, this is simple.
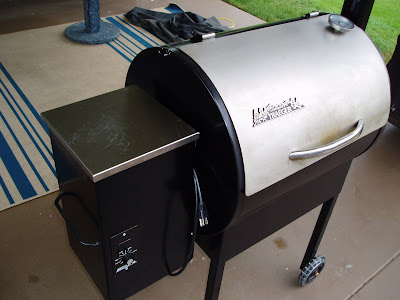
Before you get ready to cook the bird let it sit out on the counter for at least thirty minutes while you start the barbecue, or oven. Get it up to temperature. I used my Traeger Grill to cook the turkey breast.
I set the temperature for 325 degrees and this worked perfectly. I placed the turkey in a shallow baking pan lined with aluminum foil so I wouldn't cake-up my grill. You can imagine what a nightmare it would be if you didn't with all that syrup.
At seven, plus pounds the turkey breast took three and a half hours before it reached just a little shy of 190 degrees internal temperature. In the last half hour I misted the bird with a combination of apple cider vinegar and orange juice to help seal in the juices.
Before serving the bird it was wrapped in aluminum foil and allowed to sit out for thirty minutes before carving. The puppy always checks out anything like this first for poisoning. He said it was ok to go ahead and eat.
You can easily do a roasted turkey breast in an oven or on a gas grill. If you use a gas grill, use indirect heat, meaning, heat one side of the grill, and not the other. Place the turkey on the unheated side. A charcoal grill will be a little different. You can place a drip pan on the charcoal shelf and place the coals on a semi-circle around it while placing the bird over the drip pan.
Whatever way you cook the turkey you are just going to love it!
Labels: Cinnamon, Cooking Turkey Breast, Maple Syrup, Roasted Turkey Breast, Traeger Grill, Traeger Grills, Traeger Recipes, Turkey Breast
Cooking a pork roast to make pulled pork takes about eight hours. There is no getting around the time factor. 'Tis, not a 30 minute meal.
In a hurry? You are better off to go out and buy it at "Billy Bob Buzzard's Raunchy Q Pit" at about twelve bucks a pound�..but, that's when it's on sale. And, it ain't goin' be even close to your stuff if you do it right!
I have made pulled pork many times, but have written about it only a couple of times. I make it from a pork shoulder roast, (other names: pork butt, Boston Butt) and usually barbecue on my Traeger Grill. It always has turned out great because of the mechanics of the Traeger.
Whether you have a barbecue grill, or not, you can still make super pulled pork. Hey, if you are still reading this post, you are my kind of people and you will be making superb pulled pork in no time!
A butcher can be your best friend in your purchase of a good pork butt. Consult them and tell them what you are going to do with it. They can help you select a good one. A four or five pound one is cool!
A Fact: Excellent pulled pork doesn't last much past one day ( A lot cooler than Billy Bob's). Since yours is going to be awesome, and with the cooking time involved, think about doing two or more of these suckers at the same time. You can always freeze the leftovers.
First, we have to prepare the pork shoulder. Wash and pat dry the roast. Make a "Rub" like the following: (Thank you Cheryl Jamison, from her superb book "Smoke and Spice", for allowing me to pass this on).
Wild Willy's Number One-derful Rub Recipe
� 3/4 cup paprika
� 1/4 cup ground black pepper
� 1/4 cup salt
� 1/4 cup sugar
� 2 tablespoons chili powder� 2 tablespoons garlic powder� 2 tablespoons onion powder
� 2 teaspoons cayenne
Get off your duff and make this Rub. You can make it for a fraction of the cost that Billy Bob Buzzard is going to charge you for his off-the-wall-smell-real-bad jar of stuff.
Now it's time to sprinkle on a generous portion of that Wild Willy mixture all over those gorgeous pork shoulders and rub it in. Next, we want to apply yellow mustard all over the pork butt. Yes, dumb old yellow mustard! It has all the ingredients for a super marinade. Believe!
Sprinkle more Willy on, but don't rub it in this time, "VERSTEHEN"? Place in a marinating container or bag. I prefer a Tupperware Marinating Container (below...Amazon has a good price on them, dude). Put in the fridge overnight.
The next day is going to start out to be super-duper exciting type of day. (Go back to the first paragraph of this post�you are going to have a blast and a very "cool day, dude"!)
Let the pork sit out for at least 45 minutes while you get the BBQ grill, or the oven up to 325 degrees. Place the roast in a shallow dish, on top of a cookie sheet for the oven. Forget the cookie sheet for the grills. Only wimps and sissies use "cookie sheets" on BBQ grills, unless you're baking some homemade cookies!
On a gas grill, you are going to cook the roast on indirect heat�.meaning turn on one burner and place the roast on the off burner side. If you don't, you will have a crispy critter that is cooked on the outside, but not on the inside. On a charcoal grill, use a two-zone fire on low heat. Shut the lid on both types of grills, and keep them shut except to "mist". Am I gettin' thru? Is the brain starting to rally?
The Misting Thing: Get yourself a squirt bottle, like you would use when doing the ironing for your wife or partner. Pour in a half cup of apple cider vinegar, and a half cup of orange or apple juice. You're in business, Dude!
Here's the schedule: (You better print it out while still awake!)
Misting, marinade and the Rub form a cool crust on the pork shoulder. It will be crusty on the outside and tender and moist in the inside. After you take the pork off, wrap it in foil and let it sit for 15 minutes before serving.
The pulled pork thing comes from sticking a fork through the crust and literally twisting the fork and pulling the pork out of the shell. Some folks separate the crust, fat and pork. How hard can this be?
Whether you make this in the oven or on the grill, it's going to turn out delicious like. Well, it is isn't it? If you do it this way you'll have folks lined up for miles waiting to get at your pulled pork.
To keep it from drying out the day after, seal in air tight packets. Try to maintain the moisture best you can.
If your pulled pork tastes bad.....which if you followed directions shouldn't, you can always pour "Billy Bob Buzzard's Groaty BBQ Sauce" all over your beautiful finished masterpiece? But it will be kinda like pouring ketchup on Kobe beef.
Labels: Bauman Farms, How Do I Make Pulled Pork, Pulled Pork Recipes, Recipe For Pulled Pork Shoulder, Traeger Grills, Traeger Recipes, Tupperware Season-Serve Marinating Container


Since yesterday was Thanksgiving in the U.S., it was the time to put the turkey on the Traeger Barbecue Grill. Ahh, but with a twist, I put something else on the grill along side it.
One of the folks that we invited to our family Thanksgiving dinner had eaten turkey a day early. As an alternative we decided to do a ham on the BBQ also. Both turned out real, real good. But, isn't that the whole idea?
Among many dishes, my wife fixed a yam dish recipe that was over-the-top which included candied pecans, brown sugar, cinnamon, nutmeg, milk, butter. Starting to get real good now!
She baked four hughmonguos yams in the oven (no room on the Traeger BBQ) at 350 degrees for about an hour. She cored them and mashed them up just like you would regular mashed potatoes with milk and butter, but then adding the brown sugar, cinnamon and nutmeg to taste.
The clincher though, was the candied pecans. She mixed them up whole into the yams.
Of course, I'm partial but I thought they were simply outstanding. And, hey why wait for Thanksgiving to have them again.
Anyway, I hope you and your family had a super Thanksgiving. We all can find something in our lives to be thankful for.
Labels: Barbecue Turkey, BBQ Turkey, Candied Yams, Traeger Grills, Traeger Recipes
 Was there some other type of a grill you were thinking about doing a pork loin on? Well, if you are a Traeger owner, or want to be a happily involved Traeger owner soon, you've got it made.
In the meanwhile dude maybe get a pork loin. Get a big hummer and cut it into manageable chunks for the grill.
Think lean, because that is what most pork loins are like these days�maybe healthier for you and family than many other meats out there.
Now, you can just stick this baby right on the Traeger out of the package and it will turn out good. But, with a little more prep on your part it will turn out superb! But, try this simple little recipe:
First, get yourself a cool marinating container like a Tupperware one. (below) Rinse the pork loin with warm water and pat dry. Pour on a generous portion of Paul Prudhomme's Pork & Veal Magic, or his BBQ Seasoning all over the pork and rub it in thoroughly.
Pour generic yellow mustard over the roast and brush it in. Sprinkle on more Pork & Veal Magic, or BBQ Seasoning but don't rub it in this time.
You'll find that plain old yellow mustard makes for a fine, superb marinade. It has all the right ingredients to help make your pork loin come out cool!
You can fool around with different marinades until the cows come home, and mind you there are some really good ones out there, but try plain old mustard just this one time.
Put the pork loin in the fridge over night. How hard can that be?
Next day, dude! Get the pork out of the fridge. Sit it on the counter. Crack a brew!
Start your Traeger Grill on "Smoke". Once started, turn to High, let it get up to temperature and then turn down to Medium.
I prefer a fruit wood pellet for pork�Apple, Cherry. You can use any flavor or combine pellets.
You can place the pork loin directly on the grill. I like to place it in a shallow pan, fat side up.
A little theory here: A lot of liquid comes off whatever you are cooking on the Traeger, and if placed directly on the grill, the juices run off onto the deflection plate and into a bucket�lost forever, dude. And, you got to empty and clean the bucket, not to mention disposing of the now yucky aluminum foil you put on the deflection plate.
But, if all those juices justed stayed in a pan, and because you have the cover closed on the grill, those juices will boil, steam and circulate throughout the unit to help permeate the meat, adding flavor, and helping to keep it moist�like self-basting.
This is kind of like the Chinese method of steaming food except we are only interested in self-basting and not steaming anything. I know of Traeger owners who like to add a pan of water off to the side when barbecuing. Is the brain starting to rally?
In reality, anything you cook on a Traeger stays pretty moist, especially if you mist in the final stages of cooking, which adds a crust and helps keep in moisture. But, if you have an additional source of moisture, like water or juices from whatever you're cooking you are really starting to cook.
Your pork loin is going to be done from about an hour and a half to two hours or 170 degrees. Stick a meat thermometer in it, dude and find out.
Ok, the misting thing: In the final stages of cooking, an hour and a half, or so, using a spray bottle filled with a cup of apple or orange juice, and about two tablespoons of apple cider vinegar, lightly mist the pork loin. Shut the hood!
After it's cooked, to gain a further taste you can put your Traeger on "Smoke" mode for 15 minutes or so. Wrap in aluminum foil for at least 15 minutes before serving.
Labels: A Pork Loin On The Traeger, Bauman Farms, Paul Prudhommes BBQ Seasoning, Paul Prudhommes Pork And Veal Magic, Traeger Grills, Traeger Recipes

A Beef Bottom Round Roast can go by many names. Meaning, dude: Beef Round Rump Roast, Pot Roast, Beef Round Bottom Roast (a tad play on words) and so forth. Whatever name they go by, they can simply be delicious!
And, maybe even taste good, so here is a simple recipe for the barbecue grill, or oven. You are into something simple, right?
Now, a beef bottom roast is is an economical, lean cut of beef...but not to be cooked so long that it can't be sliced thinly. In other words, you don't want to cook it to the point that it falls apart like a Yankee Pot Roast would. However, a good pot roast is pure heaven.
I started out with a three and three quarter pound roast. Trimmed the excess fat off and placed in a Tupperware marinating container.
A Tupperware Marinating Container (below): 'Tis the greatest thing since sliced bread!
They are heavy duty, can enclose a heavy duty chicken, beef or pork loin in the airtight mode and...are a lot safer than marinating things in metal containers or foil. Is your brain maybe starting to rally a tad?
Back to the farm! I used a not so obvious "Newman's Own Family Recipe Italian Dressing" (see below) to cover all sides of the beef. The dressing has all the right spices and oil in it to make an excellent marinade.
I am not ashamed to get happily involved with his quality products. You should, too!
It was marinated overnight and the Tupperware container was turned over to make sure the beef was equally marinated in the dressing. Ok, Dude! Back to the airtighty thing. Kinda hard and messy if the container you are turning over isn't sealed properly. Duh!
Before you put the beef, or you on the grill, or in the oven, let it sit out on at room temperature for at least thirty minutes.
Set the grill, or oven temperature to 350 degrees. I placed the beef in a shallow pan on my Traeger Grill. It also operates on indirect heat.
If using a charcoal grill, you want a two-zone fire placing the meat on the cool side. On a gas grill, light only half the grill and cook on the other. In the oven, simply place on a middle rack in a shallow container.
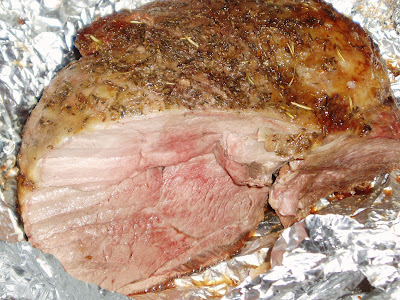
Cooking time is about two hours for a roast this size. Always use a meat thermometer. Rare beef should be 140 degrees, medium: 150 and well 160 degrees. Don't overcook.
Once the Beef Bottom Round Roast is done, wrap in aluminum foil and let sit out fifteen minutes prior to serving. This is a simple recipe as far as recipes go and one that you and your family will enjoy. Just remember to slice it thinly.
Labels: Beef Bottom Round Roast, Beef Bottom Round Roast Recipe, Beef Round Bottom Roast, Beef Round Bottom Roast Recipes, Traeger Grills, Traeger Recipes, Tupperware Marinating Containers

If you have never barbecued a turkey on a Traeger Grill before you are in for a treat.
 I started with a 14 pound bird and placed it in a plastic bag after cleaning out the cavity and rinsing with cold water. You can start with any size turkey you want.
Apply some extra virgin olive oil over the entire turkey, and then add a generous coat of Chef Paul Prudhommes' Poultry Magic on the outside skin and also the cavity. Also, if you want you can lift the skin on the topside of the turkey and apply more of the Rub and butter between the body and skin...for an additional taste!
This is not easy, so be careful. You don't want to completely remove the skin or you turkey won't come out right.
Start the Traeger Grill on high and after 20 minutes or so turn the Traeger down to medium. I used cherry wood pellets that gave it a unique taste. Place the turkey right on the grill, no pan, breast side up, cooking at a rate of between 25 to 30 minutes per pound.
Thirty minutes, per pound equates to seven hours cooking time at a medium temperature. Now, you really don't need to baste, mop or mist the turkey. But, I prefer to mist the bird in the later stages of cooking with a concoction of apple juice and apple cidar vinegar...lot's of juice, not so much vinegar. Use a laundry squirt bottle.
Ideally, you want an internal temperature of 170 degrees and a golden brown turkey. Check your bird after 2 to 3 hours on the grill and keep checking until you reach your temperature. Wrap in foil when it's cooked and let it sit out fifteen minutes before carving and serving.
Labels: Barbecue Turkey, BBQ Turkey, Traeger Grills, Traeger Recipes, Wood Pellets
One of the great foodies on Twitter asked me if I had ever cooked lamb? I had to answer, "No, because it's really expensive where I live". So what do I do? I go to Costco and buy myself a four and a quarter pound Genuine Australian Lamb Leg Roast, with the whole idea of cooking this Dude up on my Traeger Grill?
Hey, the price was $3.99 a pound which really isn't all that horrendous for a lean cut of high quality meat. And, I am going have to back off the "too expensive bit", especially if compared to the latest cost of Halibut, or Kobe Beef, maybe even hamburger or hotdogs per pound. Ok, I'm starting to get it!
I did a little bit of research on the net (which is a first) and attempted to find an original and cool recipe that I could use on the grill. Well, I found a pretty good one from this nice lady, Elise Bauer and her "Simple Recipes" Page.
She has a super nice site and gave me permission to pass on her marinade recipe for a lamb roast. Bless her, and if you don't do anything else today, please check her site out!
Now, back to the "lamb" and, yes, lamb things are surfacing: "Mary Had A Little Lamb! "The Lamb Band!" "Shop L.A.M.B.!" "Silence of the Lambs!" " Lions for Lambs!"
Ok, my brain is starting to rally and here comes the "Marinade" Per Elise:
Her lamb was cooked in the oven. Nothing wrong with that. In fact, I like the way she did it, using a water pan between the heat and the lamb roast to give the meat added moisture. I keep harping about this when using a gas grill.
It's a form of indirect cooking and adds both flavor and moisture through self-basting. Your charcoal smokers utilize this type of cooking and the end results can be excellent.
However, I wanted to grill mine using the Traeger, along with burning Hickory wood pellets. Since a Traeger cooks on indirect heat I didn't put a water pan under the lamb, but I filled two small bread pans with leftover marinade and placed them along side the roast.
Set the BBQ grill or oven at medium temperature. I set the Traeger at 350 degrees. Make sure to let the lamb sit out thirty minutes prior to cooking.
My variation from Elise's recipe was to rub down the lamb roast with Sea Salt prior to grilling. I thought it just might help to seal the juices in just a little bit more.
After it was on the grill for one and half hours I checked the roast for doneness. We prefer rare and is 140 degrees using a quality meat thermometer. Cooking anything outside takes a little more time if it's cold out. It took more like an hour and 45 minutes before it was where I wanted it.
Wrap in aluminum foil when done and let it sit out for 15 minutes before serving. For me the lamb roast came across like a lean prime rib. My wife really liked it, but felt it had just a tad bit of a gamey taste. I didn't get that impression.
Will I be cooking lamb again? You bet!
Labels: Cooking Lamb, Leg of Lamb, Roast Lamb, Traeger Grills, Traeger Recipe, Traeger Recipes

I keep posting about pork loins. Mainly, because they are reasonably priced, lean, super good and very easy to fix. I have already given you a couple of recipes in past posts, but this one is right out of the "Traeger Grill Owners Handbook".
Ok, I can't help myself I made a few deviations from the recipe, but I will give credit due where credit is due. I am impressed with my Traeger Grill (See Below) and I am very impressed with the recipes that Traeger owners come up with, and above all their level of expertise.
If you are thinking about hitting the BBQ competition circuit, well you might want to bring a Traeger to the gun fight (to borrow a jazz phrase), " With something that Cooks!"
Caribbean Roast Pork Loin
Refrigerate over night. If you don't have a Tupperware pan, use a heavy duty plastic bag. However, plastic bags can get spendy after a while. Don't marinate anything in aluminum foil or anything that is aluminum.
Start the grill, or oven, and maintain a temperature of at least 325 degrees. If gas or a charcoal grill you will want to cook on indirect heat, meaning heat one side and cook on the other.
Before placing on the grill let the pork loin sit out for at least 30 minutes. Also, I don't like to sit my pork loin directly on the grill so I place it in a shallow pan and then onto the grill fat-side up.
Cook for at least two hours. But, don't overcook or your pork loin will be as dry as a bone. In the last 20 minutes of cooking, I like to mist with an equal amount of orange juice and apple cider vinegar. This adds a nice crust to the loin. Make sure the roast reaches a temperature of 170 degrees or thereabouts.
Once cooked, wrap in aluminum foil and let it sit out for about fifteen minutes prior to serving. You will find that a pork loin is as lean, if not leaner than any other meat out there including chicken breasts. There are mucho recipes for pork loins out there and this is just another mucho good one to sink your teeth into!
Labels: Barbecue, BBQ, Pork Loin Grilling Time, Pork Loin Marinade, Pork Loin Recipe, Pork Loin Recipes, Roast Pork Loin Cooking Time, Traeger Grill, Traeger Grills, Traeger Pellet Grill, Traeger Recipes
 There are literally hundreds of barbecue grills to choose from. It's confusing to say the least. My goal is to help you narrow the field a tiny, and get you on the road to really good BBQ'ing, or Q'ing.
Warning: Barbecuing is additive. It gets in your blood! Pretty soon you start thinking about ways to improve your BBQ skills....well, the whole idea is to get you BBQ'ing so good that folks will be foaming at the mouth to get at it.
To start with, gas grills can be fun! It's nice to have one in your arsenal. They are very convenient to use. And, for straight-away grilling they beat cooking inside the kitchen any day of the week.
Another thing is, an excellent quality gas grill can be had for a lot less than what they were not to many years ago.
Personally, I barbecue all year around. I live in Oregon, and the weather isn't always conducive to outdoor barbecuing. This is where a gas grill exceeds. They start fast, get up to temperature fast, cook fast, and clean up fast.
If you want to get the steaks, or hamburgers going after work, there is nothing speedier than a quality-built gas grill to get the job done. And, there are a few tricks that will make your grilling even better. I will talk about this in a future post.
Charcoal grills are also a choice, and are less money than there gas counterparts. The problem is; "charcoal", because it takes a while to get the charcoal going just right, and in the meanwhile, if speed, or convenience is an issue you're stuck in the mud. But, there is a BBQ you are going to absolutely love because it takes the hassle out of starting the charcoal.
With charcoal grills you will be able to do more with your food in regards to taste. Many years ago I invested in a "water smoker" for less than forty dollars. If you don't know what they are, they are barrel shaped and have a dome-like lid.
The coals sit at the bottom of the unit, and in between your grill and the coals, is a water pan. The water heats up and basically self-basts anything you have on the grill. It keeps the meat moist and, ideally, you are smoking it at the same time. The slower you cook it, the better.
A good water smoker is: well, sort of a substitute for a wood burning pit that will cost a lot more. The smoker I have has two racks in it. For example, you can barbecue a turkey on one rack, and a beef roast on the other.
If convenience is an "item", or you are going to grill nothing but hamburgers, steaks and shish kabobs, a gas grill is probably the choice. If you are serious about barbecuing, I would recommend the Weber Performer, their "Smoker", or a Traeger wood pellet BBQ.
Ok!
1) For an outdoor gas grill, the Ducane Affinity 4100 (See Below) is recommended. It has features that others don't have in it's price range.
Much of the Ducane 4100 is stainless steel construction. It is totally enclosed, meaning the propane tank is out of the way and you can store BBQ tools in that space, out of sight and weather. If you have stored a BBQ outside you know what I am talking about. Best of all, you can cook at high temperatures, which is a must for searing steak.
The Ducane also comes with side burners. This is a cool perk! Make sure you invest in a cover for this, or any other grill. The unit will last twice as long if you do.
2) A lot of folks love charcoal for the smoky, old-school flavor it lends to whatever is on the grill. However, not many folks like the hassle of dealing with charcoal, starting them and having that chemical aftertaste that lighter fluid can leave. This is where the Weber Performer (See Below) shines, and it has a cool table to boot.
The Weber Performer's Touch-n-Go ignition system uses liquid propane to light charcoal with just a simple touch of a button. In turn, when the coals are white-hot, you're ready to Q.
Even cleaning up afterwards is easy, thanks to their One-Touch cleaning system--a simple sweep of a lever pushes ashes into a removable catch pan for quick and easy disposal. Get a cover for it! If you want to convert it into a water smoker there is an attachment you can buy that will do just that: The Smokenator 1000 (See Below)
3) For water smokers you'll like the "Weber 2820 Smokey Mountain Cooker/Smoker" (See Below). It is more expensive that the Brinkman, but is much easier to regulate, and to add charcoal and/or water when needed. It comes with an accurate thermometer which is super important in your BBQ'ing. You can grill hamburgers, steaks, and whatever on em', too. You don't have to use the water pan to grill.
4) The wood pellet grills, like the Traeger Lil Tex (See Below) are an option, although you can grill on them, and if all you do is steak and hamburgers, they are a lot slower and don't grill as hot as the gas grill does. On the other hand, if you want your barbecuing results to astonish everybody.....get one...try pulled pork, or ribs.
They run on a system that is very unique. The pellets are not the ones that they use in pellet stoves. They are especially made for BBQ'ing.
The pellets come in different flavors�.like hickory, cherry and so on. You fill up a bin that is on the side of the unit with the pellets. In turn, an auger transports the pellets to a small fire pit below the grill. Make sure you invest in the cover for it, they are somewhat expensive, but well worth it.
The pellets help flavor whatever you put on the Traeger Barbecue Grills. The results are amazing! However, for even better results you would want to use a rub and/or marinate to make your BBQ even more finger-licking good.
Labels: Barbecue Grill, Barbecue Grills, Ducane Affinity 4100, Outdoor Barbecue Grills, Traeger Grills, Weber Performer Grill, Weber Smoker, Weber Smokey Mountain Cooker Smoker
 Actually you grill Filet mignon....not the BBQ thing. The idea is to grill them fast on high heat so that you seal in the juice and the flavor.
 So if you are still with us�whatever you do start out by getting a good cut of meat!
Filet Mignon is French for "dainty fillet". It is a steak cut taken from the tenderloin section of a beef which is the part that is squeezed between the sirloin and the top sirloin section.
So that you know there is a multitude of liberties taken by folks who butcher them up and label them. Meaning you can pay a rather steep price for Filet Mignon that may look good but comes from an inferior part of a beef and not the tenderloin.
It gets down to�.do you really trust your butcher? Interrogate them under bright lights and/or the "nail thing" until they confess.
Back to grilling: Many Filet Mignon cuts I have seen come wrapped in bacon. There are just as many exceptions. It's no biggie one way or the other. It gets down to your preference.
You can also marinate them. I don't, but if you prefer to do so use Newman's Own "Family Recipe Italian" (See Below). Marinate over night in a closed plastic bag or a "Tupperware season-serve marinating container" (below).
If bacon wrapped I would remove while marinating and reattach with toothpicks when you are ready to grill.
Take out the steaks out of the fridge at least thirty minutes before grilling. In the meanwhile set you grill to high heat.
The idea is to sear the cut five to eight minutes (depends on thickness) on each side on a gas, or charcoal grill (Two Zone Fire). If you have a Traeger Grill, you will want to grill at least eight minutes or even longer. Time it, don't guess. Turn steaks only once.
Before the time is up, stick a meat thermometer in one of the steaks. One hundred forty degrees is rare�.160 is medium. If you want, (simple recipe) serve with Blue Cheese on top and garnish with a jumbo green olive inserted into the top with a toothpick.
Labels: Bauman Farms, Filet Mignon Marinade, Filet Mignon Recipe, How Long Do You Grill Filet Mignon, How To BBQ Filet Mignon, Traeger Grill Recipes, Traeger Grills, Tupperware Season-Serve Marinating Container
 The way I got interested in a Traeger Barbecue Grill was through a local hardware store in Willamette, Oregon�not far from my home.
This is a old fashion hardware store. They have every thing that you need, including exceptional customer service. In other words, you walk in with part A, but don't have part B, not only will they have part B in stock, they will show you how to connect them. My kind of place!
One thing you wouldn't expect out of a hardware store is to have them serve pulled pork and brisket sandwiches. They have several Traeger Grills outside the store, barbecuing up a storm during working hours.
The aroma from the Traegers was overwhelming! You can smell the barbecuing from 500 hundred yards out.
Duh Time! Their premise is taken from a basic, much overlooked, nobody-ever-pays-any-attention-to- marketing course! (Basic Marketing Strategy 101)
Was it the aroma thing that me lead to walking into the store? Maybe, leading to, and sampling one of their brisket sandwiches? Golly, Gee!..."Did you BBQ that on the grills that are outside?
Did their aroma and taste thing work? Duh! I am now a proud owner of a Traeger Lil' Tex Elite Grill.
Get Happily Involved, Dude: The Traeger works through burning a special wood pellet as fuel....a wood burning smoker grill. In order to do this proficiently, the pellets are feed through a hopper via an auger which transports them to a small fire pit.
To run the auger you need electricity and this is where the "electric" part comes into play. You also need electricity to run the control which starts the unit and controls the temperature.
My unit has a digital read out control for the different settings. It also has a professional grade temperature gauge which tells me the exact temperature of the cooking area.
What sets Traeger Grills apart from many other barbecue grills is that they cook on indirect heat. There are several plates, which deflect the heat, between whatever you are cooking on the grill and the fire box.
This allows you to barbecue things for quite a spell without burning the heck out of something. A must for slow cooking and good taste.
The wood pellets come in all kinds of flavors: Apple, Cherry, Mesquite, Hickory, Oak and so on. I cater toward the fruit woods. I like that kind of taste. Some Traeger owners mix different flavors together for unique tastes.
The pellets are real wood, and through a unique manufacturing process, no adhesives or chemicals are added. They contain a natural adhesiveness that keeps each individual pellet in tack.
My Elite has a small footprint and is ideal with those with limited space. I can still put a monmouth turkey on and cook other things at the same time, like a good size ham and four or five baked potatoes.
The Traeger needs to be vacuumed out on a fairly regular basis. If you don't things get plugged up. It's kind of a no-brainer, common sense thing...every BBQ grill needs to be cleaned on a regular basis.
If you decide to get happily involved with a Traeger Grill, a cover is a must. They are not that expensive, and will protect your grill for years.
You can live without the digital read out control, but I would spring for the professional grade temperature gauge. It's good to know the exact temperature you are barbecuing at.
If you are in a hurry to barbecue, impatient with everything in the world...get a gas grill! A Traeger isn't for you. Traegers are all about having a nice brew, or glass of wine, relaxing and slow cooking.
If you are interested in how good your chow can be, something that will impress family and friends, buy a Traeger. Your food will turn out superb.
The Traeger Owner's Cook book is a must to get you going though. Follow a couple of their recipes and everyone will think you're a genius. It's that simple, folks!
Labels: Bauman Farms, Traeger Cookbook, Traeger Electric Barbecue Grills, Traeger Grills, Traeger Recipes, Traeger Wood Pellets, Wood Burning Smoker Grills
 My family and I love Country-style Pork Ribs. These are serious-sized ribs. My father-in-law use to call them Dinosaur bones, and rightfully so when he barbecued them.
This package of pork ribs weighed five pound and there were five of them. So each rib weighs a pound. These ain't etsy bitsy baby back ribs, folks! Ok, they are theoretically not even ribs at all, but...who cares!
Your goal, anytime you are BBQing, or cooking, should be to add taste and keep whatever you are cooking moist and tender. This may be a "Duh!" but the "moist & tender" part can be tough to achieve if not done right.
Let's get to the recipe, now. Wash the ribs and pat dry. Rub with a generous amount of EVOO.
If you don't know what that term means you may want to consult "Rachael's Unabridged Dictionary Of Cooking Terminology". Hey, you'll also learn what "Delish, Stoup & Yummo" means.
Just kidding, she's a Doll and prepares excellent food and you can learn a lot from her! Maybe the fastest cook in the world!
Rub the ribs with EVOO and placed in a plastic marinating container or large plastic bag. Next, pour a generous amount of a quality Rub on these puppies. I prefer to make my own and here is a good one from Cheryl Jamison (author of Smoke & Spice...see her two books below) who has given me permission to pass it on : "Wild Willy's Number One-derful Rub Recipe".
Once you have her Rub made, distribute generously on the pork ribs and rub in real good. Now, this works like a champ for a marinade, just plain old yellow mustard. ( Has all the ingredients you'll need for one of the best marinades you'll run across)
Don't go berserk! But, pour on a fair amount of mustard and distribute with a cooking brush.
Best results dictate marinating the pork ribs over night. Before you put them on the grill or in the oven, let them sit out for 30 minutes while you get the cooking temperature up to medium or 325 degrees.
My Traeger Grill cooks on indirect heat and theoretically I can put them directly on the grill, but the mess with the mustard could be catastrophic. I highly suggest that you some type of pan when cooking.
On a gas grill, use indirect heat by lighting one side of the grill and putting the ribs on the other. On a charcoal grill, a two-zone fire should do the trick. Put a water pan in the middle of the grill to keep things moist. See this gas grill tip: ( How To BBQ Pork Ribs On A Gas Grill).
In an oven, I suggest using a Dutch Oven, or Clay Pot. Add a little water to the Dutch Oven so that you maintain moisture and don't burn up the meat.
Cooking time should be around two hours. Check for internal temperature, ideally around 170 degrees. I added another 20 minutes to this by smoking them on the Traeger at 90 degrees. You can do the same thing on a gas grill by using a "Smoker Box"!
Once you take the pork ribs off the BBQ, wrap in foil for 15 minutes before serving. I would even do the same with a Dutch Oven.
I hope you enjoyed this post on this very simple recipe. Sometimes things can just get too complicated and why not just do simple?
Labels: Gas Grill Tips, How To BBQ Pork Ribs, How To BBQ Ribs On A Gas Grill, How To Grill Pork Ribs, Traeger, Traeger Grills, Traeger Recipes

The short answer to "how long do you grill asparagus for" is: not very long. You will absolutely destroy it if you grill it too long.
Set your grill on medium heat, 325 degrees or so. Shut the hood and let it heat up to temperature. I normally use only one burner...assuming you have a gas grill. On charcoal, use a real medium fire. On a Traeger Grill you can get away with high heat.
Multitasking time: While you are waiting for the grill to do its thing, remove the woody ends from the asparagus.
Pay attention! Remove the woody end from just one stalk. Now you have a measuring devise.
Line up that baby with as many other stalks as you think you can break or cut off at one time.
Repeat, and repeat until you have gone through the bunch. Now you're cookin!
You will find that all your asparagus stalks are uniform. I make them even more uniform by trimming the break points with a knife. Wash and pat dry.
You just became the next Chef George Hirsch. Well, may be not yet, but you're getting there.
Next in your quest for perfection on this recipe, you will want to drizzle a quality Extra Virgin Olive Oil onto the asparagus.
If you didn't use anything else, the olive oil would add a nice dimension to your asparagus. But, let's be creative, let's do a little marinating.
Get yourself a good marinating vessel. Glass is fine, don't use a metal container.
Back to "drizzle"! Drizzle the olive oil on the asparagus along with a quality, balsamic vinegar. (See Below)
Don't go overboard on pouring on either the olive oil or the balsamic. A tad goes a long way.
Sprinkle on cracked pepper and a Kosher Salt but, once again don't go ballistic.
Marinate for about an hour at room temperature. Just remember to co-ordinate this with getting the grill to the right temperature.
Once you have experienced grilled asparagus you will never want to prepare it any other way. It is super by itself, in a salad or in a soup.
Now, back to the question: "how long do you have to grill asparagus for?"�..ten minutes total time should suffice on the grill. Just remember to keep turning and turning to avoid burning. You can tell its getting grilled to completion by the deeper green color and grill marks.

Labels: George Hirsch, Grill Asparagus, Grilled Asparagus, Grilled Asparagus Salad, How Long Do You Grill Asparagus, Nakano Rice Vinegar, Traeger Grills, Traeger Recipes, Zoe Organic Extra Virgin Olive Oil

I have mentioned in other posts, that I have a gas grill, charcoal smoker and a Traeger Pellet Grill. I use them all, but for slow-cooking my Traeger puts out results that most other grills only dream about.
If you are not familiar with the Traeger brand they use a special wood pellet that is conveyed from a hopper to a small fire pit by an auger. There is a metal plate between the fire pit and the grill so that everything that you cook is done so by indirect heat.
Anytime that I BBQ a pulled pork, ribs, turkey, or if I do a couple of chickens at the same time, I use my Traeger. I have a Lil' Tex Elite and will have had it for two years come this Xmas.

The Traeger Pellet Grill is designed for slow-cooking. I am amazed on how moist and tender the meat turns out. What's cool is the wood pellets come in different flavors, like cherry, mesquite, alder, apple and so on.
The meat takes on the flavor of whatever pellet you are using. Many of the Traeger owners mix flavors to get a unique taste.
The units are built like "Brick Chicken Houses". They are well constructed and built to last.
Personally, I have found my Traeger Grill to be very economical to operate as compared to gas or charcoal. You should get the same results.
Traeger Smokers are very easy to operate. The clincher is: that you will get outstanding results with these grills even after a couple times of using one.
Labels: Apple Valley Westside BBQ, Barbecue, Traeger, Traeger Grill, Traeger Grills, Traeger Pellet Grill, Traeger Pellet Grills, Traeger Smokers

If you want to know how to make BBQ chicken, here's a simple recipe:
First, we are going to assume that you are wanting to BBQ a whole chicken. If not, this recipe will work fine for chicken breasts, wings, or parts as well.
You need to get yourself some type of a marinating pan. Tupperware makes an outstanding one.
It is plastic, it's large, inexpensive, and with the lid closed you can turn it over if you want.
Don't marinate anything in a container that has a aluminum base. As a precaution, I wouldn't marinate anything that has a metal base either.
Wash the chicken thoroughly with water, remove unwanted parts in the cavity and rinse.
Now, let's do this right. There are multiple dry rubs out there, but let's try just one.....Chef Paul Prudhomme's Magic Seasoning Blends ~ Poultry Magic
Place the washed chicken in the marinating pan and sprinkle a generous amount of the "Poultry Magic" all over the bird, including the cavity. Rub it in! Repeat, but don't rub it in this time.
Marinate it overnight. Before you fire up the barbecue, or conventional oven let the chicken sit out for 30 to 45 minutes. In the meanwhile, start your barbecue, or oven and let the temperature get up to 325 degrees.
It's time to transfer our chicken to an aluminum, or metal pan. No matter what type of pan I use, I line it with aluminum foil.
Place the chicken on the pre heated BBQ, or in the oven. If you are using a BBQ I recommend using indirect heat. On a gas, or charcoal grill use an unlit side(coals to one side). You do not want to burn the chicken.
Your "beast of a chicken", (why not use a real big chicken) should cook for about two hours on indirect heat. Check it with a meat thermometer......Should be getting real close to 190 degrees.
That is a real tough temperature to reach when you are barbecuing.
If you are about ten to fifteen degrees off it is time to apply a fantastic marinade.
Don't laugh, but I use "Catalina Dressing". It has everything you need as a marinating sauce, and then some.
Pour it all over this "chick", brush it in, and repeat.
Close the lid, or oven door. Lower the temperature to low and let the juices do their thing.
If you get kind of a "crusty looking chicken" that's ok. I cooked my bird on a Traeger Grill. I barbecued it for two hours at 325.
I then added more Catalina, turned the barbie down to 90 degrees which is the "smoke mode" and left it for another 30 minutes. I removed it from the grill and let it sit out for 15 before devouring.
Labels: Barbecue Chicken Recipes, BBQ Chicken, BBQ Chicken Wings, Chef Paul Prudhomme, How To Make BBQ Chicken, Paul Prudhomme, Traeger Grills, Traeger Recipes
 Above is a photo of a bunch of bones. This is what results when you prepare pork ribs this cool way!
Of all the rib cuts, many folks will tell you the best ribs are the ones that come from the upper loin part of the hog. These are the baby backs. The bones are curved versus the sparerib bones which are located in the lower part of the loin.
Sparerib bones are flatter, spread further apart and contain more meat than the babies. But, there is much more marbling.
Quiz time for the rednecks�..The marbling thing, can this possibly mean: "Is this what's goin' on when ya all be drinkin' suds and shootin' marbles?"
I started out with 3 pounds of ribs which worked out to about four dollars a pound. I bought baby back ribs, but you could also use spareribs.
First thing is to remove the thin membrane from the underneath side of the ribs. There is an excellent video on how to do this at: Removing Membranes For the rednecks: No, no, not the brain!
This is not my vid�.Just don't forget to come back to my page.
Ok, you have the membrane off. Well, you don't have to remove it, but you will be chewin' till the cows come home if you don't.
Wash and rinse the ribs with water and place in some type of a marinating container like a Tupperware one (below) that you can cover. Do not use any type of metal container or aluminum foil to marinate in.
For the pork ribs I used Paul Prudhomme's Pork & Veal Magic (See Below). Sprinkle on both sides and rub in thoroughly.
Sprinkle on again, but don't rub it in this time. Cover and place in fridge overnight. You can get away with a minimum thirty minute marinating time but, that's for wimps.
After you put the rub on and marinate it overnight your done and we are ready to cook.
Fortunately, I have a Traeger Grill but you can use a water smoker, gas grill to get things cookin'. If you want further info on how to do this on a gas grill leave a note on my blog.
Set out the pork ribs at least 30 minutes before cooking. On a Traeger, start the grill on "Smoke", with the lid open. I used apple pellets. Once started, close the lid and place on "High".
Wait for the high temperature. Reduce to medium heat and stay there.
Place ribs, bottom side down on the grill and cook for a least two hours or until they reach 170 degrees. Once I open the grill to check the temperature I like to mist the pork ribs with apple juice and apple cider vinegar mix�more juice than vinegar. It adds a golden crust.
Reduce heat to the smoke setting for another 30 minutes. When done wrap the ribs in foil and let them sit out 15 minutes before serving. For the rednecks: This means holding your breath for a really, really long time.
My personal feelings are that you can mess up any taste the ribs may have when you dip them, or put any type of BBQ sauce on them. When I was in the Marine Corps there were certain food types that we dipped in ketchup to kill the taste of�.if you do these ribs right you won't have to kill anything. On the other hand, folks will kill to get at em' and eat em'!
Lot's of folks like dipping and BBQ sauces! But, try your ribs without a sauce first. If you don't like them this way you didn't do them right so go ahead and smother em' with something to kill the taste.
Labels: Bauman Farms, Pork Ribs Gas Grill, Pork Ribs Recipes, Traeger Grills, Traeger Pork And Poultry Rub, Traeger Recipes, Traeger Ribs, Tupperware Season-Serve Marinating Container